2022. 4. 21. 21:00ㆍ카테고리 없음
1. 앱바 아이콘
actions [ , , ], 안에 아이콘버튼을 넣을 때는 child : Icon이 아니고 icon을 하나의 위젯으로 아이콘 버튼이 가지고 있다.
          IconButton(
            onPressed:( ){

            },
            icon: const Icon(Icons.mail),
          ),
2. elevated button
child text 맞음
      body: Center(
        child : Column(
          children: [
            ElevatedButton(
              onPressed:(){
                debugPrint('bonam눌림')
              },
              child: const Text('보낸편지하암')),
          ],
        ),
      ),
3. 버튼 스타일 꾸미는 두가지 방법
            ElevatedButton(
              style: ElevatedButton.styleFrom(
                primary: Colors.green,
              ),
              onPressed:(){
                debugPrint('bonam눌림')
              },
ElevatedButton(
style: ButtonStyle(
backgroundColor: MaterialStateProperty.all(Colors.red),
),
onPressed: () {
debugPrint('2번버튼이 눌림');
Navigator.pushNamed(context, '/2nd');
},
child: const Text('Go to the Screen2nd'),
),4. return
return 에서 material app 안에선 scaffold가 child 아니고 home
    return MaterialApp(
      home : Scaffold(~
5. drawer
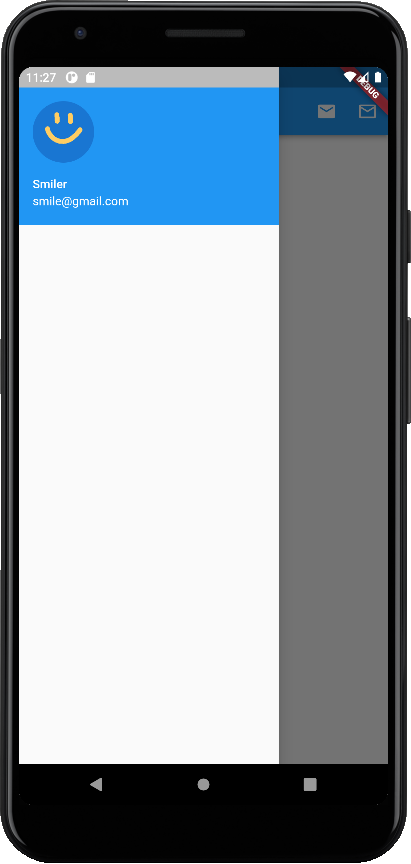
drawer 에서는 열의 형식으로 (listview + children [ ] ) 헤더와 타일을 넣어준다.
5-1) UserAccountsDrawerHeader ( )
헤더에는 사진, 계정, 주소 등을 넣을 수 있다.
이때, currentAccountPicture 은 일반 이미지삽입과 다르게 asset image 로 이미지를 넣는다.
        drawer: Drawer(
          child: ListView(
            children: const [
              UserAccountsDrawerHeader(
                currentAccountPicture: CircleAvatar(
                  backgroundImage: AssetImage('images/main.png'),
                ),
                accountName: Text('Smiler'),
                accountEmail: Text('smile@gmail.com'),
              ),
            ],
5-2) ListTile( ) ,
타일은 앱바와 같다. 목록은 보통 아이콘 하나에 그 아이콘을 설명하는 카테고리 내용이 들어가므로, row 를 쓰는 것이 아니라 appBar 에서처럼 아이콘 하나를 왼쪽에 넣을 때는 leading을, 이름은 title : 을, 누를 땐 onTap() 을 사용한다.
          child: ListView(
            children: const [
              // tile
              ListTile(
                leading: Icon(Icons.mail_outline_outlined, color: Colors.green),
                title: Text('보낸 편지하암으로 가기'),
              ),

              ListTile(
                leading: Icon(Icons.mail_outline_outlined, color: Colors.red),
                title: Text('받은 편지하암으로 가기'),
              ),
            ],
          ),
이때, 아이콘 색변경은 Icon (Icons.아이콘명, color : ) 로 Icon() 안에서 진행한다.

6. Navigator 연결, route 사용
6-1) route
먼저 페이지 만들고 페이지 안에서 정의한 class를 main 에서 부른다.
부를 땐 initial route 를 사용한다.
import 'package:flutter/material.dart';
import 'package:pikachuwithmail_app/pages/bonam.dart';
import 'package:pikachuwithmail_app/two_buttons.dart';

void main() {
  runApp(const MyApp());
}

class MyApp extends StatelessWidget {
  const MyApp({Key? key}) : super(key: key);

  @override
  Widget build(BuildContext context) {
    return MaterialApp(
      initialRoute: '/',
      routes: {
        '/': (context) {
          return const Twobuttons();
        },
        '/bonam': (context) {
          return const Bonam();
        },
        '/badum' : (context) {
          return const Badum();
        }
      },
    );
  }
}
6-2) onpressed, Navigator.pushNamed(context, '참조할 라우터명');
눌렀을 때 이동이므로 stack의 push 생각, 근데 이게 앱바 안이라서 actions 안의 버튼 안에 onpressed임
          actions: [
            IconButton(
              onPressed: () {
                debugPrint('앱바 아이콘으로 보낸편지함 눌림');
                Navigator.pushNamed(context, '/bonam');
              },
              icon: const Icon(Icons.mail),
            ),
            IconButton(
              onPressed: () {},
              icon: const Icon(Icons.mail_outline_outlined),
            ),
          ],
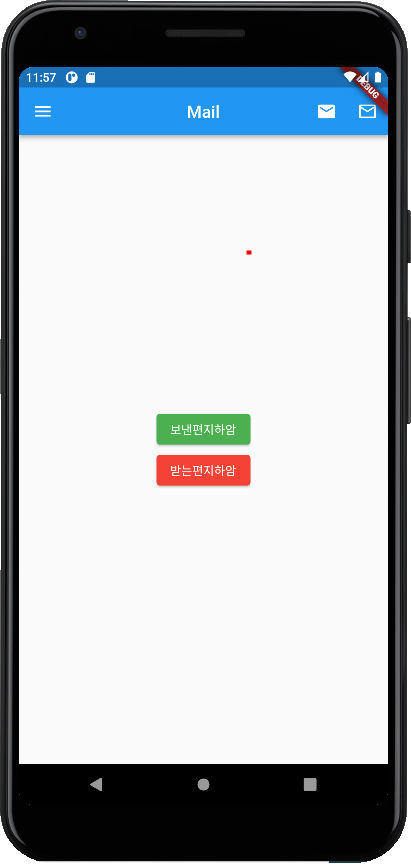
만일 페이지에 띄워진 body의 버튼으로 누르는거면
body: Center(
child: Column(
mainAxisAlignment: MainAxisAlignment.center,
children: [
ElevatedButton(
style: ElevatedButton.styleFrom(
primary: Colors.green,
),
onPressed: () {
debugPrint('버튼으로 보낸편지함눌림');
Navigator.pushNamed(context, '/bonam');
},
child: const Text('보낸편지하암')),
],
),
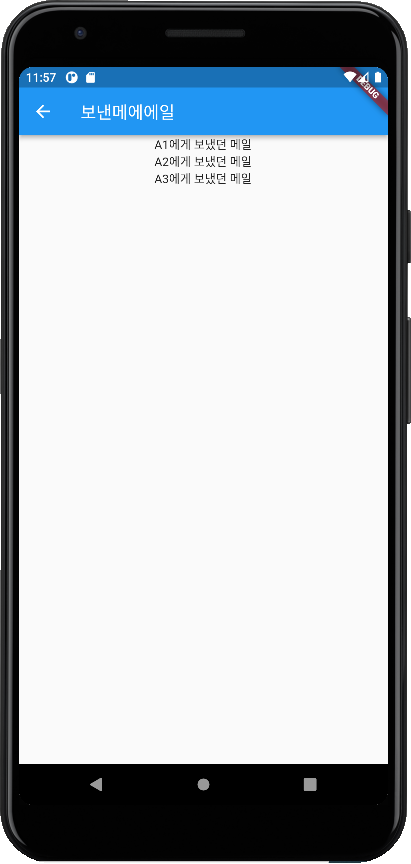
),아래 사진에서 왼쪽의 초록버튼이나 꽉채워진 아이콘 클릭하면 오른쪽 사진으로 페이지가 구현된다.
전체 코드
1. Router 구현한 메인파일
import 'package:flutter/material.dart';
import 'package:pikachuwithmail_app/pages/bonam.dart';
import 'package:pikachuwithmail_app/two_buttons.dart';

void main() {
  runApp(const MyApp());
}

class MyApp extends StatelessWidget {
  const MyApp({Key? key}) : super(key: key);

  @override
  Widget build(BuildContext context) {
    return MaterialApp(
      initialRoute: '/',
      routes: {
        '/': (context) {
          return const Twobuttons();
        },
        '/bonam': (context) {
          return const Bonam();
        },
        // '/badum' : (context) {
        //   return const Badum();
        // }
      },
    );
  }
}
2. 버튼 구현한 네비게이터 기본 파일
import 'package:flutter/material.dart';

class Twobuttons extends StatelessWidget {
  const Twobuttons({Key? key}) : super(key: key);

  // This widget is the root of your application.
  @override
  Widget build(BuildContext context) {
    return MaterialApp(
      home: Scaffold(
        appBar: AppBar(
          title: const Text('Mail'),
          centerTitle: true,
          backgroundColor: Colors.blue,
          actions: [
            IconButton(
              onPressed: () {
                debugPrint('아이콘으로 보낸편지함 눌림');
                Navigator.pushNamed(context, '/bonam');
              },
              icon: const Icon(Icons.mail),
            ),
            IconButton(
              onPressed: () {},
              icon: const Icon(Icons.mail_outline_outlined),
            ),
          ],
        ),
        body: Center(
          child: Column(
            mainAxisAlignment: MainAxisAlignment.center,
            children: [
              ElevatedButton(
                  style: ElevatedButton.styleFrom(
                    primary: Colors.green,
                  ),
                  onPressed: () {
                    debugPrint('버튼으로 보낸편지함눌림');
                    Navigator.pushNamed(context, '/bonam');
                  },
                  child: const Text('보낸편지하암')),
              ElevatedButton(
                  style: ElevatedButton.styleFrom(
                    primary: Colors.red,
                  ),
                  onPressed: () {
                    debugPrint('badum눌림');
                  },
                  child: const Text('받는편지하암')),
            ],
          ),
        ),
        drawer: Drawer(
          child: ListView(
            children: const [
              // header
              UserAccountsDrawerHeader(
                currentAccountPicture: CircleAvatar(
                  backgroundImage: AssetImage('images/main.png'),
                ),
                accountName: Text('Smiler'),
                accountEmail: Text('smile@gmail.com'),
              ),

              // tile
              ListTile(
                leading: Icon(Icons.mail_outline_outlined, color: Colors.green),
                title: Text('보낸 편지하암으로 가기'),
              ),

              ListTile(
                leading: Icon(Icons.mail_outline_outlined, color: Colors.red),
                title: Text('받은 편지하암으로 가기'),
              ),
            ],
          ),
        ),
      ),
    );
  }
}
3. 네비게이터로 연결되는 메일함 파일
import 'package:flutter/material.dart';

class Bonam extends StatelessWidget {
  const Bonam({Key? key}) : super(key: key);

  @override
  Widget build(BuildContext context) {
    return Scaffold(
      appBar: AppBar(
        title: const Text('보낸메에에일'),
      ),
      body: Center(
        child: Column(
          children: const [
            Text('A1에게 보냈던 메일'),
            Text('A2에게 보냈던 메일'),
            Text('A3에게 보냈던 메일'),
          ],
        ),
      ),
    );
  }
}
읽어주셔서 감사합니다.